This is made just like the original: cut from a vintage US Army
half-shelter 30" wide by 36" high. Already weathered and ready to wear. It includes
a
button
hole
in
the
upper
corner,
see attachment
diagram for details.
Star Wars photos:
Our photos:
Canvas ESB Cape:$30
This is made from two different colors of "duck cloth" canvas material. Made in the same pattern as the movie prop. Already weathered and ready to wear. See attachment diagram for details.
Star Wars photo:
Our photos: Ankle Spats: $20
These are the parts that fit over Boba Fett's boots. They are made of heavy weight cotton, off-white material with a velcro closure.
Star Wars Reference photos:
Our photos:
TK409
Chest Display: $70
(356k)
My brother designed and built this and I think they turned out very nice. They're
no bigger than a credit card and are EXTREMELY bright - even in daylight. I used
dark green faceshield plastic for the window in my chest armor and it shines
a bright red even through the dark window (as seen in the photos and movie
clip).
Powered by one 9-volt battery with a cord that measures 22" long for easy storage
wherever you want. Note: battery cord is now mounted from the bottom of the board,
rather then the top as shown in photos.
Your armor slots should be cut to this size: (Thanks Brak's Buddy)
Length of slots: 43mm
Height of top slot: 4mm
Distance between slots: 8mm
Height of bottom slot: 8mm
Utility pouches: $35
Our photos:
Star Wars photos:
These heavy cotton canvas hip pouches use the velcro closure and the accurate
seamless front stitching (current photos show the front seam - photos
coming
soon). The top loop slides over your ammo belt and will fit up to a 3.75" wide
belt. Also used on these other costumes: Dengar, Snowtrooper, Biker Scout, Arc
trooper, Barc trooper
Gloves $80
To make your own. Use white parade gloves, dye them gray, and sew on white patches of cloth. Vest: $75
Yes, the vests are back! This Boba Fett Vest is a very close replica of the vest
used in the Star Wars movies. My sister made this one for me. The color
is an accurate
light
cream
color with a slight sheen. I've since weathered it with a misting
of gray spray paint - this is necessary to make the vest look authentic. Otherwise,
the vest looks too clean in relation to the rest of the weathered costume.
Slots in the back are
for
the
jetpack
harness
straps.
I've
done
a tutorial
on adding snaps for attaching your armor - check it out below.
Snap Tutorial:
I traced around my armor on paper and cut it out (marking which side of the paper armor faces out).
Then, I cut some rectangular tabs of plastic (sintra), drilled a hole in one end and stuck the male snap through. For me, the rectangle tab is important, because I superglue the end without the snap (the tab) to the armor.
Using a blade, I scored (made several marks) both on the armor and the plastic piece in a crosshatch pattern. Then added superglue to the tab, and pressed it onto the armor.
Then I pressed the paper onto the armor (now with snaps) to make a mark on the paper (to know where the snaps are located.)
I laid the paper out on my vest exactly where I wanted the armor. Then I used a pencil to poke through the paper where the snaps should be located (twist it a couple times to mark the vest).
At the mark, use a nail to poke a hole through the vest. Then assemble the female snap through the vest at the hole.
TK409 Neckseal: $45
Star Wars Reference photos:
Our photos:
Designed by Mrs. TK-409, sewn by my sister Di (who does the vests). It's a replica of the Neckseal worn by Boba
Fett in "The Empire Strikes Back" and "Return of the Jedi".
The neckseal fits nice and snug and it stays up too! No more sloppy, baggy neck like you
see on some Fett costumes. The flush-velcro closure in front makes it easy to
put
on and has a nice, accurately finished look.
Mini Zam Wesell:
I built a Zam Wesell costume for my daughter using craft foam. The body suit is actually a matching longsleeve tee and leggings, found at WalMart. The hood is just a draped piece of purple fabric, safety-pinned at the front to the foam symbol. The stringed beads are craft store Christmas Tree string ornaments. She looks all serious because Bounty Hunters aren't the smiling type, but she was positively thrilled to be Zam for Halloween. More details on the parts at the Flickr set.
ARMS:
I used standard WalMart girls' gloves, with foam armor attached with hot glue. I spray-painted the foam silver and weathered it with black craft paint. Total cost, about $3. Shin armor made of foam, from the craft store. I think the foam is about 30 cents a sheet. For weathering, I misted these with a brown/gray spray paint. The gauntlets is made by layering foam pieces (Sheets of foam available at the craft store) and attaching with hotglue. The black ribbed piping is exactly that, piping: like you see on the edge of couch pillows - available at any fabric store.
HELMET:
The helmet is a foam fireman's helmet trimmed slightly and worn backwards. Helmet available at fabric stores or WalMart around Halloween. Also try toy stores. The little symbol is made from Sculpey. If you know how to use Playdoh, you can use Sculpey. Ear cups are layered foam. I added an elastic band under her chin to keep the ears close to her head. The binoculars are sprinkler pipe fittings and are screwed to the top of the helmet to keep brackets in place. Binoc brackets are just styrene strips (like 'For Sale'; sign plastic) The veil is simple purple fabric sewn to red velvet. Velcro was added to the ear cup and the veil for easy detachment.
VEST:
The Chest armor is all foam. I spraypainted the vest lavender and attached industrial velcro (the adhesive kind) to the vest to hold the foam armor. Don't use hotglue to attach the foam to the vinyl, it'll fall off when it cools. The hoses are from Radio Shack and are attached to the vest with zip ties. The round hose fittings are plastic electrical bushings. The triangular fittings are made using Sculpey. It's as easy to use as PlayDoh. The Sculpey is attached to the hoses. Everything can be found at hardware stores, Radio Shack, craft stores and fabric stores. Total cost, about $8.
SKIRT:
Rather than stitch every square together, I cut strips of fabric, then hotglued each foam square to the strips. I varied the colors of the squares like the movie costume. Misted with brown/gray spraypaint for weathering. Ties around the waist.
OVARIES:
Theese lumpy silver things are made of Sculpey. I wadded up tin foil until I got the general shape I wanted, the wrapped it with Sculpey. The hose is from Radio Shack and is zip-tied to a belt.
SHIN ARMOR:
Shin armor made of foam, from the craft store. I think the foam is about 30 cents a sheet. For weathering, I misted these with a brown/gray spray paint. Fastened with a safety pin.
SHOES:
Shoes are aqua socks from Walmart, about $2 and painted purple. Toe caps are a baby cereal bowl, cut into quarters and hotglued to shoes. Foam armor on top, hotglued to shoes.
HOLSER & BLASTER
The holster is made of foam and loops over the belt. The blaster was a generic dart $1 gun from WalMart . I cut off some parts, added the Zam tip to the end and painted it blue and silver.
The Mini Fett Project:
Photos by Bill Kraus and Rick Hill
Bill Krause is working on a cool mini-fett outfit for his 4-year old. The pack and chest plates are constructed from black
foam-core and hot-glue, painted and weathered with craft paint. Check back for updates.
Bill writes:
This really just started out as an afternoon project to make something fast and dirty and kinda expanded as I got into it. I basically used the reference photos found elsewhere on this site as well as the four-inch action figure (Power of the Force) for the rough shape, details and colors.
The scale was eyeballed based on my son's size. The chest plate pieces and collar were cut with a sharp x-acto knife from black foam-core, which is a little stiffer than the white. The pieces were bent slowly by hand to give them a slight curve and then white-glued in position on a backing of plain posterboard.
Two Velcro straps were glued on the reverse side of the chest and collar plates to extend to the back plate.
Another strips of Velcro is glued at the beltline to hold the chest piece in place to the belt attaching the backplate.
Ê
After priming, the overall color of the armor is painted in FolkArt's 927 "Old Ivy"
The edges and scratches are dabbed in Testor's Silver and then the whole thing slightly misted in flat black spray paint.
Ê
The back plate for the jetpack is cut from black foam core and notched to accommodate the elastic Velcro waist-belt and the shoulder straps.
The jet pack was cut from white foam core and hot-glued together.
The center tube was a 1 3/4" cardboard gift-wrap roll.
The leading edges on the pack were also covered with electrical tape to make the odd angles a little smoother.
The tops to the side canisters were plastic lemonade mix cups as well as the middle transition piece.
The cones on the center tip were rolled from posterboard and glued together over a smaller diameter 3/4" cardboard tube from a clothes hanger.
The engine nozzles were a fortunate find. I happened to have these in my spare parts box - they're from Mattel's 32-inch Space: 1999 Eagle toy and just the right size!
[These came out in the late 70's are a bit rare.] They're screwed into two wood balls I bought at a woodworker's shop, drilled through and placed on either end of a 1/2" diameter wood dowel that's slid through the jet pack body - the dowel is also left loose so that the jets can swivel.
The pack was primed and hand painted in the blue, yellow and dark red craft paint then weathered with dry brushed silver over the edges with some dusting/overspray of flat black spray paint for that "used" look.
The nozzles and center tip were masked and painted in silver chrome before weathering
The back of the pack was covered with a 3" by 5" strip of Velcro that mates with its counterpart on the backplate.
Here's the kid in action:
Photos!
See the pics of my finished Boba Fett costume on Flickr:
Braks Buddy's Fett Reference Library:
This is the most comprehensive photo reference library on the Boba Fett costume
available. These photos contain extremely detailed images from the actual screen-used costumes. You'll find high-resolution photos from
publicity and merchandising shoots as well as examples of some of today's best
fan-made costumes. Photos shot by the Web's best known Fett archivist, Brak's Buddy.
Reference Photos ESB
The "Mystery" Helmet:
Mine is an original SgtFang helmet, which is available. In
my opinion, it's the most accurate helmet around. Once called the original "Mystery Helmet", it's origins have been confirmed as cast from one of the production helmets on ESB.
Here are the measurements and
photos so you can compare to other helmets. The Marrow
Sun,
helmet is also an excellent and accurate Fett helmet.
Visor
I got the dark green visor at RJSafety.com scroll
down for "Polycarbonate Faceshield -Clear" Get the Dark Green one. You can cut it
with scissors. Use the same for Sandtrooper lenses too. You can use a regular high-temp hot glue gun to install it or two-part
epoxy putty to hold the visor inside the helmet. I done it both ways and both are effective.
Make little
blobs of it and press it in. Hold the visor in place until the epoxy hardens
to a metal (3-5 minutes). Here's how I installed the visor using two-part epoxy putty (no drilling required)
Painting the helmet: Here's what I did for the ESB version.
Primer, then paint the black areas
Then mask off everything but the red areas. Trim excess tape with an Xacto knife. Paint red.
Now mask off everything but the green areas. Paint green.
Kill Stripes Contact Scott for easy-to-apply vinyl kill stripes. He has them for both ESB & ROTJ as well as weathered and non-weathered. I recommend cutting the sheet in two or three sections and applying one section at a time at a time to curve around the helmet correctly.
ROTJ
ESB
Don Post Deluxe Recast (Found on eBay).
The Deluxe helmet is cast from the Don Post Deluxe
helmet used on the Don Post Deluxe Statues seen at Alan Sinclair's site. These are smaller and less accurate in proportion to the movie version. See my comparison here. Don Post '95 is smaller still. See the comparison here. The Don Post '97 is the most commonly sold helmet today. It's the same size as the '95, but has become extremely inaccurate and small.
For the silver shoulder studs, they used computer keyboard keys.
Painting the green armor pieces:
Primer gray
Spray Rustoleum "Spruce Green"
add cream-yellow craft paint weathering spots
add silver inside the yellow weathering spots
Add the decal, then mist the armor with black spray paint.
Apply charcoal-gray craft paint with a damp sponge over parts of armor, then dab it with the sponge until it looks more subtle.
The yellow armor
(knees and shoulders) was done in Rustoleum "Sun Yellow", then dusted with
rust-colored primer. I applied the decal, and sponged it the same way as
the green armor.
.
Jumpsuit: Contact Daz for jumpsuits. That's where I got mine and it's the best around. High-quality cotton, accurate details, great color and a fantastic fit! You add your own weathering.
The following photos are of a jumpsuit I received from another maker several years ago. Use these photos for reference.
Here's a great diagram for attaching your hoses to your jumpsuit with a notch. For mine, I basically, sewed a simple loop of elastic to the longsleeve, underneath the outer sleeve, drilled a hole in the end of my hose, and zip-tied through the hole and through the loop.
Wookiee Scalps:
Find them at craft stores (in the dolls section for about $2 each) Fett Boots by CABoots:
"Star Wars: Magic of Myth" Reference photos:
CABoots:
Champion Attitude Boots recently developed a Boba Fett boot that is the best available. They're extremely comfy,the construction is superb and they are very close to the look of the screen-used boot. Joey at CABoots.com was very helpful and open to suggestions on making the most accurate boot possible. All you add is weathering and toe spikes (tips below).
Scratchbuilt
Fett Boots:
"Star Wars: Magic of Myth" Reference photos:
Nothing can compare to CABoots Fett boots, but if you're on a tighter budget and $100 is too expensive, try making your own. I've made four pairs of boots from leather ankle boots found on ebay. I know they aren't exactly screen accurate (they're leather) But they ran me only about $25 total each to make. I Started with a pair of black leather boots:
Painted them with gray latex house paint:
Then I weathered them with tempera paints (olive, black, and gray from a craft store). I used some very small black piping (fabric store) and trimmed off the extra fabric. I drew lines on my boots where I wanted the piping to go and added it to the boots using regular superglue:
I primered the soles with KILZ Latex sealer/primer house paint. Then I added two coats of white latex (not gloss) ceiling paint. For the spike mount, I used 1/2" wide X 1/8" thick aluminum flat bar (hardware store). I bent it in a vise (it's aluminum so it bends easily) Drilled holes for the screws, (first in the aluminum, then the sole) then I screwed the mount directly into the rubber sole of the boot:
For spikes, I used a wood dowel and sharpened it with a pencil sharpener. I attached them to the mount using superglue gel. Here's a tip, add superglue to the ends of the piping to keep it from fraying:
Then I weathered the soles with the tempera paints:
ROTJ Blaster Rifle
(EE-3 Carbine)
There are a couple of different ROTJ rifle kits out there. Click here for measurements. This kit is the more accurate version - assembled/painted by me from parts by a maker who is no longer making them. However, Patrick currently has resin kits cast from the same type Webley Flare gun used in the films. You convert them to the movie blaster by adding the wiper blades, scope and PVC barrel.
Both the original ESB and ROTJ prop guns used a WWI Webley and Scott No. 1 Mark "1" flare pistol as a base. See photos at these links:
Shin Tools These are made by Darth
Flan cast from original patterson stir sticks and squeeges - the same found items they used in the films. He sells them for around $60 finished or around $40 for an unfinished kit.
Star Wars reference photos (thanks to Brak's Buddy)
Rope (girth) Belt:
Made for about $12. Reference photos:
I started this project before I knew you could get a 38" girth belt for $18. Dye or spraypaint burgundy.
Here's my parts list:
40 feet of 1/4" cotton rope from the hardware store.
burgundy Rit dye
two 3/4" buckles
one yard of black 3/4" strap material
I dyed the rope, then I cut it into fourteen 32" pieces. I lined them
up and just stitched a needle straight through 7 rows and back again
(repeat 3 times) at 4 points along the belt.
Once I got 2 belts of 7 rows each, I lined them up and stitched the two belts into one big one of 14 rows. I got two 3/4" buckles and the black ,3/4" strap material at the fabric store. I left some extra on the straps so I can adjust it to the perfect length once I try it with my armor on.
Cheap
LED Chest Display:
Star Wars Reference photos:
So, this took about 30 minutes and 8 bucks. And no complex wiring - cool!
First, cut the slots in your
armor to this size: (Thanks to Brak's Buddy)
Height of top slot: 4mm.
Distance between slots: 8mm.
Height of bottom slot: 8mm.
Length of slots: 43mm.
Here's what you'll need:
1) printed transparencies. Do this on any laser printer.
2) Bell Bicycle safety light from the bicycle department of any WalMart, Target or hardware store for about $8.
3) white or red paper & scissors
Here's a video. The bicycle light has 6 different settings, this video only shows 1 of them:
(1.4mb)
First, print out this image on a laser printer on transparency (clear) paper.
Remove the cover of the Bell safety light. This reduces it to 1/2" thick. Easy for fitting under your vest or armor.
I added a piece of red paper behind the transparencies to help evenly disperse the light from the LEDs.
Place the transparencies behind the slots in your chest armor
Then attach the Bell light behind your vest (you'll need to cut a hole in your vest) for best result. Low-budget and easy!
$19.99 Bad Robots T-Shirt
Power Converters not included.
These droids aren't bad, just drawn that way. Art by Chris F. Bartlett. Printed on 4.5oz, 100% soft spun cotton, fitted t-shirts. Sporty v-necks for the girls. Not your father's boxy tees.
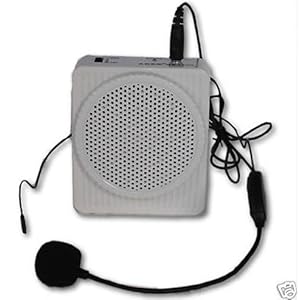
Costume Voice Amp
I use the compact Aker voice amp for all my costumes. It's perfect for the stormtrooper or Boba Fett amplified voice effect as it's LOUD and clear. You'd mount it inside your chest armor or on your belt or in an ammo pouch. It has an input for the mic and a second input for an MP3 player so you can speak AND play sound effects at the same time. It's fantastic. Comes with a charger so it's all self-contained. Perfect for crowds since you can hear it across the street!
From TK Electronics.
I've also used the Xtreme Gadget voice amp, although it only has the single mic input and it's twice as big as the Aker. XtremeGadget.com.
Another amp is the Hisonic "waist band amplifier" (about $59 shipped). Comes with battery-charging capability and two microphones (one headset and one lapel mic) plus, It's a little smaller than the Xtreme Gadget.
Pat offers this review:
"It is very LOUD. Putting this on my belt I can only turn up volume to 75% before I get feed back. Even behind my [trooper] chest plate 30% volume is more than loud enough. You have to add the static burst on your own. The Hisonic comes with a nice head band mic that has a formable wire frame that you can mold to wrap around the back of your head and the mic has a seperate formable wire to place the foam covered mic at your best spot. The amp/speaker unit holds 6 AA batteries and will allow you to recharge with an ac adapter. I thought this would make the unit some what bulky and hard to place. I found that the unit fits nicely behind the upper chest plate and I can use the enclosed strap to mount it to my chest from around the back and under the arms or around the stomach area. The strap is black with black plastic slips so it's easy to hide."
The speaker can be worn behind the chest plate since it comes with a neck strap (Stormtrooper) or placed in the thigh or waist utility pouch (Boba Fett).
Machined Aluminum Parts
Russell has produced several parts in machined aluminum. For more info, contact him here: cambareng@hotmail.com He will cut the price if you order more than one piece. Prices include shipping.
Kamino Saber Dart (US $45, UK £22)
Anodized Black Aluminum Display Stand (US $18)
Jetpack beacon (US $59, UK £35)
Gauntlet darts (US $41, UK £24)
left gauntlet missile (US $145, UK £85)
Jetpack stabilizer (US $52, UK £29)
Knee darts (US $46, UK £27)
See photos here:
Jetpack:
This was originally an Empireikes-Back-green jetpack - but I believe it began life as one of Golden Armor's kits. It came to me in ESB green and I repainted it for ROTJ.
For the yellow-orange, I used yellow with a mist of rust primer. Instead of pure white, I used off-white. The blue is royal blue misted with gloss black. Red is Rustoleum (American Accents) Claret Wine (same color used on gauntlets) I primered black under the red for a darker burgundy. Nozzels are off-white, misted black. See what colors Arturo Delgado used to paint his.
I weathered everything with several different colors of craft paint (olive, black, mustard, light-gray, rust) and Testors silver, model paint. Jetpack Harness:
I modified the voice amp harness I made for my Sandtrooper and it seems to work well. All you need is black straps, sold by the foot from the hardware store and buckles from the fabric store. Total cost: about $8. Then you'll need to sew them together. See diagram 1. wrap one strap around your chest, add 12", cut. 2. drape straps over your shoulder with each end meeting the chest strap, cut. Repeat for other shoulder. 3. add buckle to each end of the chest strap 4. cut two 10" straps (for the jetpack hooks) 5. sew two opposing pieces of velcro on each jetpack hook strap 6. sew the two 10" straps to the tops of your shoulder straps.
This IS another idea from Arturo Delgado. It fits under the vest:
Gauntlets:
email Chuck at Ruffkintoy@yahoo.com for
info about the same gauntlet kits I have. I built and painted them based on the Magic
of Myth exhibit. To insure a good fit, I put the two halves on each arm and
drew a line where I wanted them to meet. Then I added the velcro inside to make
them fit appropriately. After that, I added foam inside to keep them from rolling
around my arm. Paint used is RustOleum American Accents:"Claret Wine" and
Testors silver model paint. Then I sponged on some black craft paint to dull
the
red a little. On the left gauntlet, I attached buttons
from Radio Shack. I also recommend replacing the flamethrower nozzels (on
left gauntlet) with Radio Shack's"Premium
PL-259 UHF-Type Coaxial Connectors"
Left Gauntlet:
Right Gauntlet: Fett Links:The Dented Helmet
The most comprehensive site for how to make or acquire a Boba Fett costume FpArmor.com
FettPride's ULTIMATE Fett Costume. Now, with tutorials. StarWarsHelmets.com
Prepare to be blown away with every last bit of comparison information you'll ever need! AMAZING! Build Your Own Boba Fett
More ideas for building Boba Fett on a tighter budget. The Ultimate Boba Fett Costume
Helpful tips for your Fett costume Boba Fett Multimedia Page
Fett in comics, soundbytes, desktops, postcards, books, history, etc! Boba Fett Fan Club
Want to work for credits? The officially unofficial site is looking for a web maintenance staff. JediNet Multimedia
Amazing Star Wars Photo Archive Replica Prop Forum
Amazing prop collections and how-to forum. Jedi-Academy
Tips on building your costume Boba Fett Fan Club
Who's NOT a Fett fan?! StarWars.com
The official site
Star Wars Desktops
Download cool TK-409 Star Wars desktops made by your favorite Bounty Hunter


 Ankle Spats:
 Canvas ESB Cape:
$30
Canvas ESB Cape:
$30 


 The "Mystery" Helmet:

 Scratchbuilt
Fett Boots:
Scratchbuilt
Fett Boots: 

 Jetpack: